ET Mapping Tutorial Lesson 2
Making your first brushes
[bearbeiten]The building blocks of a map
Imagine making something using lego bricks - the lego bricks of mapping are called Brushes. By putting brushes together you can make terrain, buildings and all the things inside them. Given enough time, and brushes, you can create a whole enviroment in which the players can run around shooting each other. But unlike lego bricks where you are limited to the number, shape and colour of the bricks in your lego set, in Radiant you can create as many bricks, with whatever size, shape and colours as you want.[bearbeiten]Creating a brush
Brushes are created in the 2D window. To create a brush click and drag in the 2D window. A newly created brush is automatically selected, so it shows in a dashed red outline. To deselect your selection, press ESC. To select a brush, press shift+click. You can keep adding to a selection by selecting additional brushes. You can delete a selection by pressing Backspace.You can see your brush in the 3D window - move the 3D view around until you can see your brush nice and centrally (right click in the 3D window and use the mouse/arrow keys). It will be a blue/black check (when not selected) with "Shader not found" written on it. We'll sort out some proper textures later.
[bearbeiten]Moving a brush
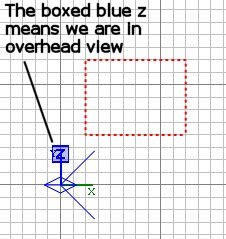
Brushes can be moved in the 2D or 3D window. The 2D allows precise movement in any axis, while the 3D gives you a more intuitive feel for placing something just where you want it. Ensure the brush to be moved is selected. You can move multiple brushes if they are all selected. To move a brush in the 2D window, put the cursor within the brush outline and click/drag. You can move in any axis by first changing the 2D view (cycle through the view by ctrl+tab). Generally if you have used ctrl+tab, make sure you end up in the overhead view (the blue Z will be large and in a box).To move a brush in the 3D window, put the cursor within the brush and click/drag. The axes you can move it in will depend on your viewpoint and in which direction you are looking.
Have a go at moving the brush in each of the 3 dimensions. When you're done, leave the brush roughly around the 0,0,0 co-ordinate, ie where the XYZ axes are shown on the grid.
[bearbeiten]Resizing a brush
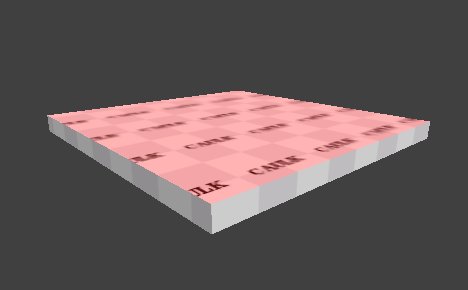
Brushes can be resized in the 2D or 3D window. The 2D allows precise movement in any axis, while the 3D is best used only when the axis for change is clearly seen and controlled via the mouse, otherwise you are likely to drag the brush into the wrong size in an unintended axis. 2D is clearest. Ensure the brush to be resized is selected. You can resize multiple brushes if they are all selected and you want to resize them in the same dimension. To resize a brush in the 2D window, put the cursor just outside the edge of the brush and click/drag. When you drag you resize in the direction you drag in - drag away to make larger, drag inward to make smaller.Have a go at resizing the brush in each of the 3 dimensions. When you're done, leave the brush as shown in these pictures (a flat square). On subsequent views of the map you may need to reverse a little in the 3D window in order to see the square. This is because the camera will start at the origin (0,0,0) and will be looking at the inside.
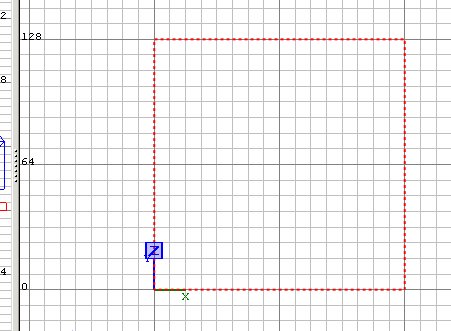 | 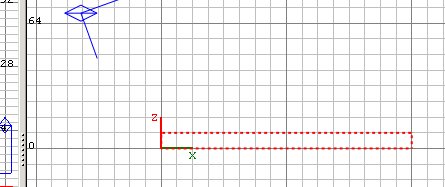 |
| Overhead view | Side view |
[bearbeiten]Applying texture to a brush
Textures - what's that all about then? A texture is the name given to the image applied to the face of a brush.A brush typically has 6 faces, all of which will have a texture applied. At the simplest level a texture on a face will be a JPG or TGA file of anything from a single colour up to an image of the Mona Lisa. Some special textures are used for the faces that don't need to be drawn, for example where two faces are flush against each other, or a face faces away from any player and will never be seen (and so need not have a visible texture applied to it).
One special texture for this purpose is called Caulk. Faces with caulk on them are not drawn, and so must never be somewhere that a player could look at it. You've probably played a map where a caulked face is accidentally visible, and you get a weird hall of mirrors effect while you look at it. So you must ensure all caulked faces cannot be seen.
In making a map you should be trying to achieve your design aims using the least number of brushes and the least number of visible faces as possible. One way to achieve the latter is to create your brushes initially entirely from the caulk texture. Then you "paint" the visible faces with the required texture, safe in the knowledge that all the other faces are caulked.
For example, say you created a brush to be used as floor in a room. You decide to make the whole brush a wood texture and you slot the brush into place. You forget to later caulk the bits you can no longer see, so you end up with 5 other faces that the engine must consider when deciding what to draw, when if they had all been caulk it would not present this overhead. It may seem like small fry, but a map like 2tanks has 8,000 brushes, and so about 48,000 faces, which translates to around 96,000 triangles to be considered and possibly drawn. As you want to try to keep the maximum number of triangles drawn to under perhaps 40,000 you need to ensure you use caulk wherever possible.
So let's start correctly with the flat square we've created. We're going to make that the floor. We caulk an entire brush by selecting the brush and clicking the Caulk button. 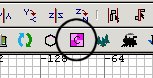
Textures are applied in the 3D window. Point at the top face of the flat square and press ctrl+shift+click. (To cancel the face selection, press ESC. You can select multiple faces by pointing at more faces one at a time and ctrl+shift+click them into the selection. You can also deselect a selected face in the same way.)
Now we need to tell Radiant what texture to apply.
Click the "textures" menu item. You can now choose to see the textures available under the various folder names. It's a bit of trial and error here as you go looking for the texture you'd like. For now choose Wood. All the textures in the folder will now show in your textures window. Don't worry about those that show as red/black squares.
Click on one you like; I am using wood_m05a_usata.
Ok, we've created a floor!
[tutorial03.htm Next lesson]